BigBlueButton
BigBlueButton (BBB for short) is an open source web conferencing system. It is provided by the IT department on the university servers at the HWR Berlin.
The service is recommended for presentations, seminars or lectures. An integration in Moodle is provided. The video conferences and recordings take place on the servers of the university. From a data protection perspective, the use of BBB is highly recommended.
Please note the advice of the data protection officer regarding the use of conference tools in education at the HWR Berlin during the Corona-related restrictions (currently in German only).
Please note the information for lecturers regarding the recording of web conferences in education at the HWR Berlin using BigBlueButtonBigBlueButton (currently in German only).
Here you will find information about how to deal with disruptions in videoconferences.
Inhalt
Preparation
Which web browser should be used?
The conferencing system is web-based and can be accessed via common browsers *. So far, the most stable connection has been achieved via Google Chrome and Mozilla Firefox. We recommend that you use these browsers!
* limited or no support: Safari, Internet Explorer, Edge (old non Chromium based version).
OnBoard peripherals (webcam, microphone) are sufficient for use. Depending on the output volume, it may be useful to use a headset or headphones to prevent audio feedback.
Avoiding disconnections
If possible, it is recommended to avoid a WLAN connection when participating in video conferences. Switching from a WLAN to a wired Internet connection can actually make the difference in terms of connection stability. If you can’t get a stable videoconference over WLAN even though a good signal strength is indicated, then you may be dealing with a less obvious problem – too many surrounding WLAN networks are using the same channel.
Is there a maximum number of participants?
We recommend that individual sessions do not exceed 100 participants.
What should be considered for large events?
If you do not know how many participants could really come* or if you have events where the maximum number of participants is 100, but you have to work with several camera streams for content reasons, it is recommended to use the streaming option of the video conferencing service “Pexip” German Research Network (Deutsches Forschungsnetz / DFN).
For large events that should contain interactive parts, you would have to either
- split them (streaming via Pexip for the plenum and BigBlueButton for single working groups) or
- work with the optional chat as a return channel when streaming via Pexip.
* According to previous experience, online formats are likely to have more participants than face-to-face formats.
1. Access to the service (web interface)
1.1 Sign in
Open a browser and type https://meet.hwr-berlin.de in the address bar. Click on “Sign In” in the upper right corner. You can sign in with your user account of the HWR Berlin. This is the ID you also use for the other services in the university network, such as Moodle or e-mail account (the user name is not your e-mail address).
A BBB meeting can also be embedded directly in Moodle. This offers the advantage that only students enrolled in the respective course can join the meeting and that they do so with their real name. Information on this can be found in the section Using the BBB Moodle Activity.

Access the conference service
(Click to enlarge)
1.2 Create Rooms
Here you will find an overview of the rooms you have created and shared by others. With a click on “+ New room” you can create a new room.
By clicking on a room you can view / manage the recordings that are made within it, upload a presentation in advance, give access to other people and adjust the settings.

Room overview
1.3 Room Settings
In the settings, the User Settings can be adjusted on the right-hand side and the Room Name can be changed on the left-hand side, as well as the access codes can be viewed, generated or also removed if required.
The access code for viewers is set by default and the access code for moderators is optional.
Use the Join Link and access code to invite participants to the meeting room.

Room Settings
When sharing, make absolutely sure that the access code for viewers (participants) is not mistaken for the one for the moderators, otherwise the viewers will have extended rights.
1.4 Start Meeting
After clicking “Start” you will be redirected to your meeting room. Choose how you want to join the conference – with microphone or listen-only. You may then be prompted to enable the microphone in your browser. Depending on your selection, a short echo test will be performed to verify that your microphone is working.

Start meeting
(Click to enlarge)
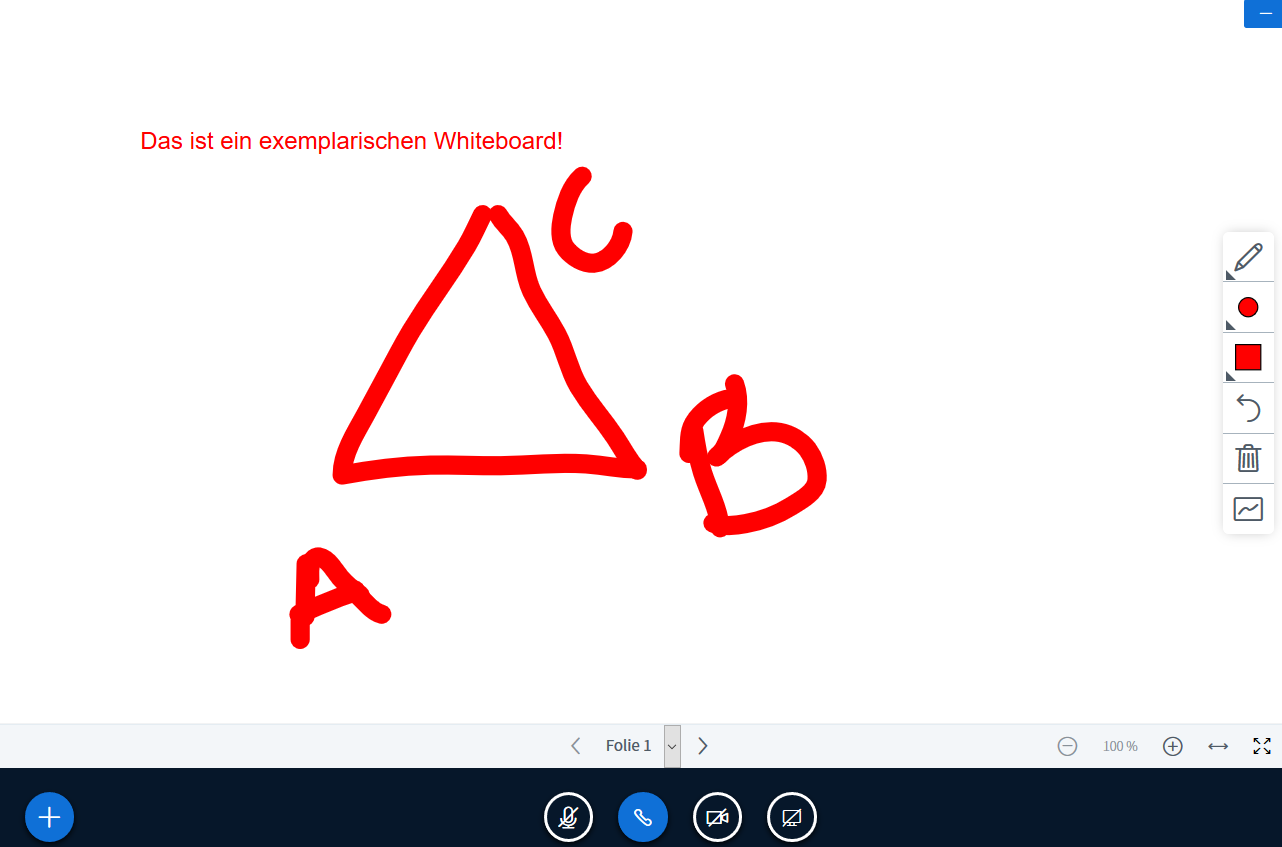
1.5 View of the room with whiteboard
You have now entered the meeting. The existing presentation or one you have uploaded can be used as a whiteboard.
The person with the rights to present will see a sidebar on the right side of the screen, where you can select different tools or switch on the multi-user mode. The latter allows all participants to access the sidebar and work together on the whiteboard.
An explanation of the other icons can be found in the next section.

View of the room
(Click to enlarge)
2. Service Usage

Overview of a meeting room (click to enlarge)

2.a Manage Users
Here you can adjust settings for the participants, e.g. you can mute all of them or create breakout rooms (group rooms).
Please note that the presenter is still visible to others while sharing a screen.

2.b Shared Notes
Here you can create notes next to the meeting, which are visible and editable for all. This way, questions or important information can be collected. Please note that the notes are not automatically saved.
By using the right button (sheet with down arrow) you can export the notes.

2.c Chat Options
Using the chat, you and the participants can communicate with each other. Furthermore, you have the option to save, copy or clear the chat. The latter is advisable if you want to use this course room several times in a row without a break. Then you should empty the chat regularly.
Click on the three dots in the chat and the options “Save”, “Copy” and ” Clear” will appear.

2.d Sidebar Toggle
You can hide the list of users within the meeting, as well as the chat. This gives you a larger viewing area for a presentation or the shared screen, if necessary. With another click on the person icon you can show everything again.
2.e-i Action Bar

e) Actions, such as start a poll, upload /manage presentations, use a whiteboard* or share an external video
f) Mute / unmute microphone
g) Share / stop webcam
h) Share screen
i) Restore minimized presentation
* How to create and use a whiteboard on BigBlueButton is described in more detail in the FAQ at the very bottom of this page.
2.j Start / pause / resume recording
Here you can start the recording of the conference. You can pause the recording by pressing the recording button again and resume it at any time by pressing it once more. Completion of the recording starts when you end the meeting.
Access the recording or share the link
A click on the presentation button leads you to the recording. Once you have opened the page, you can copy the link to the recording from the browser’s address bar and share it. To ensure that only university members can view the recordings, authentication is mandatory before access. For students, this is also possible with the user ID of the HWR Berlin. This is the identifier that is also used for login to the university network, Moodle or e-mail account (the user name is not the e-mail address). With a click on the three dots you can delete the recording or send the recording link by e-mail.
For each recording a visibility is assigned, which can be changed by clicking on it in the recording overview. By default, this is set to Unlisted.
Public: All people who have the room link can see the recording.
Unlisted: Only people who have the link to the recording can view it.

Recording a conference
(Click to enlarge)
The recordings are available with a delay after the conference has ended. Depending on the length of the conference and the workload of the recording function, the waiting time may vary. Please be patient.
Please note the instructions for lecturers regarding the recording of web conferences in education at the HWR Berlin using BigBlueButton (currently in German only).
2.k More Options
Here you can make the application fullscreen, configure other settings, leave or even end the meeting.

Adjust more settings
(Click to enlarge)
3. Breakout Rooms (Group Rooms)
currently in German only
4. BBB in Moodle
This section will show you the possibility to create BigBlueButton meetings directly in Moodle. Compared to the BigBlueButton web interface (Greenlight) (see 1. Access to the Service) there are some advantages and disadvantages which need to be considered:
- Joining the videoconference is only possible for people enrolled in the respective Moodle course. External persons without an account of the HWR Berlin cannot be invited. There is also no link that could be shared. If you would like to invite external persons and / or be able to share meeting links, please use the web interface.
- Participants enter the meeting with their real names. In contrast to the web interface, there is no option to give yourself a different name.
- Meeting rooms created in Moodle are independent and cannot be seen in the room overview of the web interface.

4.1 Turn editing on
In order to add the activity to your course, you need to activate the editing mode first by clicking the “Turn editing on” button in the top row.

4.2 Add BigBlueButton Activity
Select a section where you want to add the activity. There click on “Add an activity or resource“. In the window that opens, choose the “BigBlueButton”.

4.3 Configuration
Now you can configure your settings. The name of the virtual classroom is the only mandatory information you need to create the activity. Everything else you can set up as you wish.

4.4 Activity/Room Settings
By default, the “Wait for moderator” setting is active. This means that participants from the course can only join the meeting if there is a moderator in the room. If you disable this setting and you do not otherwise restrict the activity, then students could enter the meeting room and interact without you.
The “Mute on Start” option mutes the microphones when you enter the room. Participants can un-mute themselves on their own.

4.5 Join Session (student/guest)
As a student or guest, you will be taken to a short information page by clicking on the activity in the course. If you are a lecturer or if all the requirements for entering the room apply to you as a student, simply click the “Join session” button to enter the meeting. If the button is not clickable for you as a student, then it is simply not possible for you to join a meeting at that moment. You will also get the information on this page “The meeting hasn’t started yet. ou will automatically join when the meeting starts.”
Häufig gestellte Fragen – Frequently Asked Questions (FAQ)
What does the error 1002, 1004 or 1007 mean?
This is probably due to the proxy, firewall, or VPN settings of your devices or the network you are currently connected to. The audio and video connection could be restricted or blocked as a result. Please deactivate corresponding (personal) settings during the conference or configure your firewall as required. If you are unable / unwilling to do so, a possible workaround could be to use a VPN connection to the HWR Berlin network, but this may result in a slower internet connection, which may cause dropouts in audio and video.
How do I create and use a whiteboard?
Using the blue plus button (Actions) you have the possibility to upload a presentation. Create (outside the conference service) a blank presentation or add a few white slides to an existing one and upload it to BBB.
On the right side of the screen there is a sidebar that allows you to access various tools. There you will find, among other things, a pen or text tool that can be used to write on the slides like on a whiteboard. Via the multi-user mode, the whiteboard can also be shared with other participants.
Alternatively, you can show other programs or services through screen sharing.
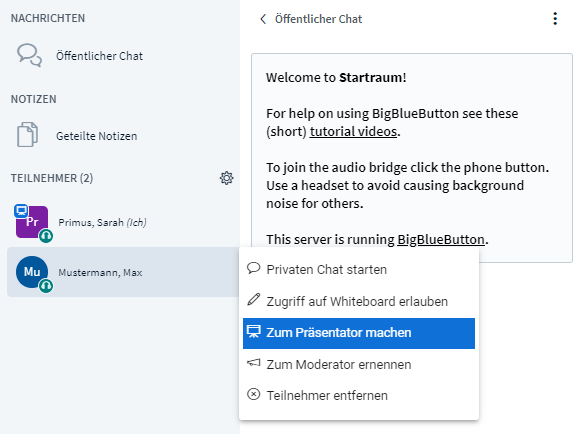
Can I authorize screen sharing for participants?
Yes, you can. Click on the corresponding person in the people list and select “make presenter”. The person will now be able to upload presentations or share the screen.
Why doesn't screen sharing work even though I'm a moderator / presenter?
If you use Firefox or Chrome, you may have denied the necessary permissions at the first attempt. If so, you will not be asked for them again on later attempts. To change this, click on the lock to the left of the URL in the browser’s address bar. There you can see what rights you have currently granted to the web page. You may need to allow screen sharing again.
If the “Allow” or “Share” button is not active, you still need to select the application or screen to share first.
Special case: Please do not use the Safari browser.
Why doesn't screen sharing work on my Mac even though I'm a moderator / presenter?
On macOS, you have to allow screen recording for the browser you are using. Typically, it will be asked for permission the first time you want to use this feature. If you once denied this or clicked away, you can reassign this permission in the System Preferences.
To do this, go to MacOS System Preferences > Security & Privacy > Privacy > Screen Recording (see macOS User Guide). After clicking on the lock in the lower left corner you have to enter your MacOS password and can now check the box in front of your browser.
There are disturbing feedbacks during the meeting. What should I do?
Feedbacks occur when the sound from the speakers is recorded again by the microphone.
Therefore, we recommend the use of headsets. We also recommend that only the person actively speaking activates the microphone and all other participants are muted. As a moderator, you can mute all participants at once (gear icon above the user list).
The camera, microphone or screen sharing suddenly stops working. What should I do?
At the last meeting everything was still fine and suddenly it doesn’t work anymore? This can have many reasons. Often other software (e.g. Jitsi, MS Teams) is accessing the camera or the microphone at the same and blocking it for other applications. Therefore, we advise closing unneeded applications or restarting the device. It often also helps to switch the browser.
Participants of the meeting do not understand me well. What should I do?
Ideally, use a headset or a good microphone. The smartphone headphones are just fine for this. It also makes sense that only the person actively speaking has the microphone activated. If your sound is generally too quiet, you can adjust the microphone level in your operating system (usually at the bottom right next to the date). If your sound stutters for other participants, then your bandwidth is probably not good enough. Disable the VPN connection or your webcam if necessary.
I can't upload my presentation. What should I do?
You can upload presentations with max. 30MB. If they are larger, an error message appears that the file is too large and you should split it into several smaller files.
The number of slides in a presentation is limited to 200. If there are more, an error message appears that the maximum number of pages has been exceeded and you should split the file into several files.
When uploading a PowerPoint presentation, BBB converts it to a PDF. Animations and any video and audio included will be lost in the process. For large and extensive presentations we recommend to use the screen sharing feature.
Can I store my presentations in the room?
Presentations uploaded during a meeting are not saved. However, you can add a presentation to a room in advance.
In the web interface meet.hwr-berlin.de, click on the three dots to the right of the room and then on “Add Presentation“.
In Moodle, go to the settings of the corresponding BBB activity. Under the item “Presentation content” you can now upload your presentation.
What can I do against annoying video and sound dropouts?
Probably your internet connection or your device is too slow. Go to Task Manager and check how the workload is.
Deactivate programs you don’t need or disable the video of your webcam.
If you can, use a wired Internet connection or find a place where you have better WLAN signal.
Can students also use BBB and create rooms?
Yes, students can also sign in at meet.hwr-berlin.de and use it to meet each other for learning and working groups.
Can I give more rights to participants during the meeting?
Yes, moderators can give moderation rights to additional people or also assign the presenter role.
The following applies to the presenter: Only one person at a time can be the presenter, i.e. show a presentation or share the screen. The rights can be assigned but also requested.
However, a meeting can have several moderators.
Is it possible to specify additional moderators for a room in advance?
Yes, in the web interface meet.hwr-berlin.de you can specify the persons that you want to share the room with. To do this, click on the three dots next to the corresponding room and then select “Manage Access“. If a person cannot be found there, this person has to log in to the web interface initially.
Persons added there will also see this room in their room overview and enter the room with moderation rights.
Alternatively, in addition to the access code, a moderator code can be generated in the room settings, which you can also share with external persons.
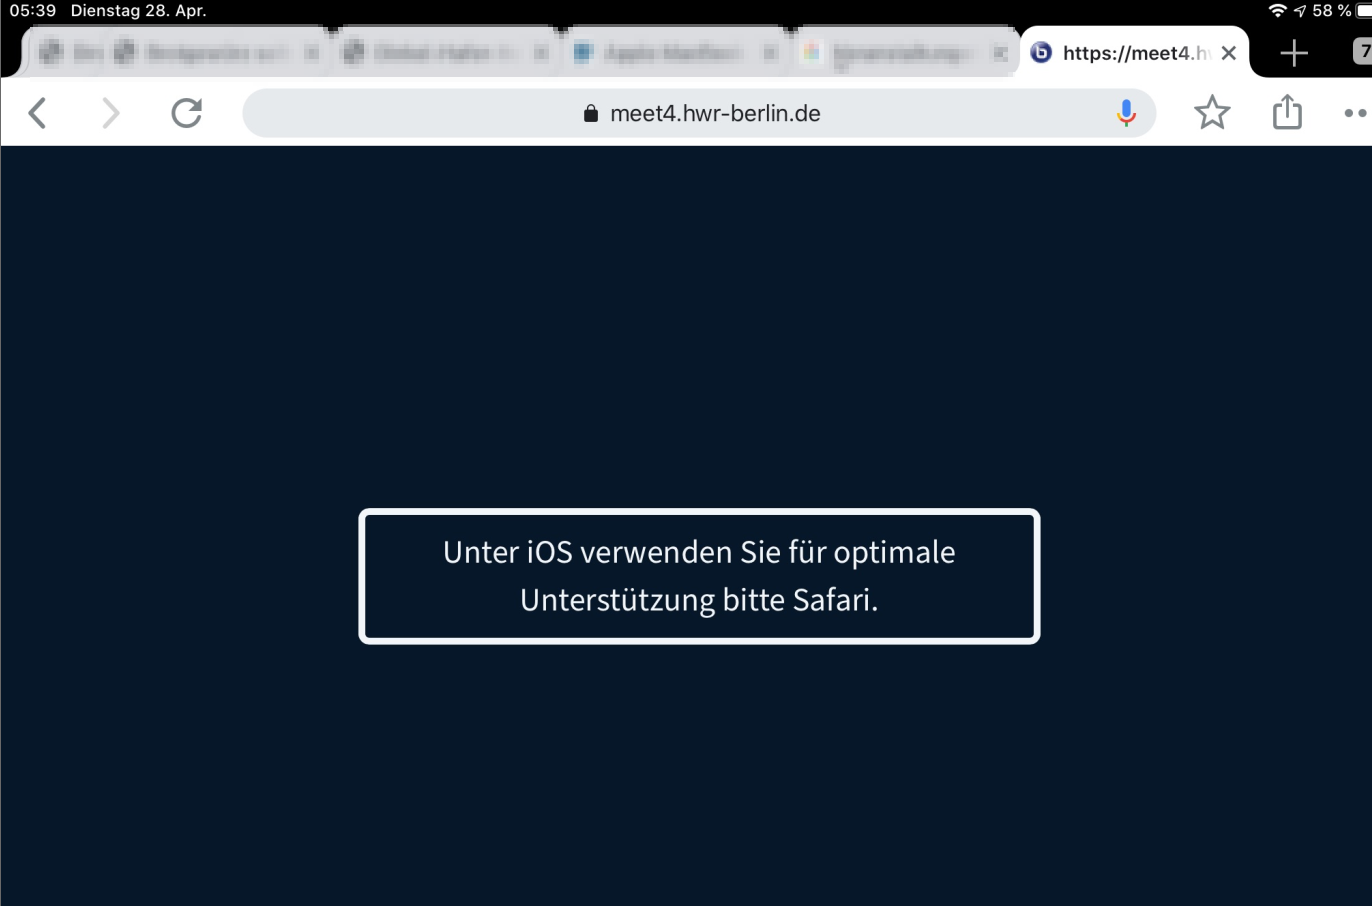
I would like to work with the iPad. What do I need to consider?
The general browser recommendation does not apply to using BBB on iPad. If you open a meeting in the Chrome browser, you get the following notice. The same applies to Firefox on the iPad. Therefore, only use Safari on the iPad.
In this case, you have to accept the restriction that screen sharing is not supported.